


Viral beauty trends come and go, but some techniques stand the test of time. One such method is underpainting—a professional makeup artist’s secret for achieving a naturally sculpted, flawless complexion. If you’ve ever struggled with harsh contour lines or blending difficulties, underpainting is a game-changing technique you need to try.
What Is Underpainting?
Underpainting is a makeup application technique that involves applying and blending contour, concealer, and blush before foundation. Unlike traditional contouring methods, which can sometimes sit harshly on top of the skin, underpainting helps create a softer, more blended effect. This method has been a staple in professional makeup artistry for years, used to subtly enhance facial features without the appearance of heavy product layering.
Why You Should Try Underpainting
The secret to getting a soft, realistic-looking finish is underpainting. By using less foundation, you get a lighter, more airy look without sacrificing effect. As the layers blend into the skin, streaks and patchiness are removed, making blending easier. The best part? Underpainting prolongs the wear of your makeup because the contour and concealer blend in better with the skin because they are placed underneath the foundation, giving you a perfect, long-lasting look.
How to Underpaint: A Step-by-Step Guide
Step 1: Prep Your Skin
No matter which order you’re applying your products in, proper skin prep is a must for flawless underpainting application. For this step, we recommend using the Pure Canvas Primer Hydrating, to hydrate and smooth any imperfections before adding any makeup to your face.
Pure Canvas Primer Hydrating Improves and extends the wear of makeup while providing instant and overtime hydration.

Step 2: Contour & Highlight
Before foundation, apply a creamy contour and concealer to carve out and define your features.
-
Use Tinted Moisturizer Bronzer in a shade two to three shades darker than your skin tone for contouring. Apply it along the hollows of your cheeks, jawline, forehead, and nose.
-
For highlighting, use Real Flawless Weightless Perfecting Concealer one to two shades lighter than your natural tone. Apply it to the high points of your face—under the eyes, bridge of the nose, center of the forehead, and chin.
- Hold off on blending!


Step 3: Add Blush & Blend
If you love a naturally flushed look, apply a cream blush to the apples of your cheeks. Our Tinted Moisturizer Blush blends seamlessly into the skin for a just-pinched glow. Now, you'll want to blend all your underpainted makeup out. Lightly blend these products using the Flawless Finish Makeup Sponge, ensuring they remain visible but softly diffused.


Step 4: Apply Foundation
Choose a lightweight, sheer-to-medium coverage foundation to let your underpainting shine through. The Real Flawless Weightless Perfecting Foundation is the perfect product for this technique. This long-wearing foundation provides medium buildable coverage that provides a healthier-looking complextion without completely masking your carefully placed contour and concealer.
-
Use 1-2 pumps of foundation onto the skin, then gently dab using the Real Flawless Foundation Brush to blend without disturbing the underpainting.
-
Avoid heavy strokes or excess product, less is more!


Step 5: Set & Enhance
When you've spent enough time perfecting your makeup look, you want to make sure it lasts. To lock everything in place and add dimension:
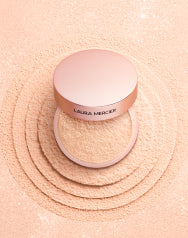
- Lightly set the face with Translucent Loose Setting Powder, focusing on areas prone to shine.
- If desired, reinforce your contour with Matte Radiance Baked Powder and top off your blush with a complementary powder shade.


Then complete the rest of your makeup and set with the Translucent Pure Setting Spray to ensure your underpainted face lasts all day.